
What to Eat Before and After Yoga According to Top Nutrition Experts
27th February 2020
Prop Yourself: 6 Surprising Yoga Prop Setups You Probably Haven’t Tried Yet
5th March 2020The Pistol Squat: How to Build the Strength, Flexibility and Mobility You Need for This Pose
Also known as single-leg Chair Pose, Pistol Squat is an advanced yoga pose. Before attempting the posture, there are certain parts of the body you need to strengthen, particularly the quads. The pose also requires a lot of flexibility and mobility to achieve, so spending time on the yoga mat beforehand is ideal.
In Pistol Squat, many yogis focus on the strength of their standing leg. However, it’s just as important to prepare the non-weight bearing leg. If you suffer from tight hamstrings, preparing your non-standing leg is particularly important.
In this article, we explore the Pistol Squat: how to build the strength, flexibility and mobility you need for this pose. The postures below will help you to build strength, mobility, and flexibility in your hips, knees, and ankles to prepare for this advanced posture.
1. Half Split
Half Split is an excellent stretch for the hamstrings. To practice the pose, begin in Low Lunge and move your hips back until they are in line with your back heel. Straighten the front knee and flex the toes of your front foot upwards. If you need more support, consider placing your hands on blocks. With a straight spine, hinge at the waist and fold forward as you breathe out. You are in Half Split. Hold the posture for around 30 seconds before repeating on the other side.
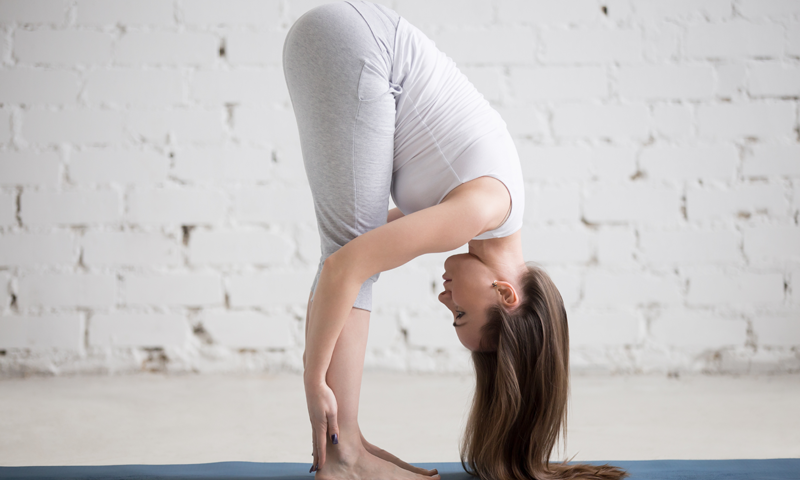
2. Runner’s Hamstring Stretch
Runner’s Hamstring Stretch helps up to prepare the hamstrings for the next stage. To practice the posture, begin standing and step one foot forward 10 inches. Hinging at the waist, lower your torso forward to a 90-degree angle. Touch your hands on the ground or blocks for support. Flex the toes of your front foot towards the ceiling, keeping your front knee as straight as possible. As your hips move back, softly bend your back leg. You are in Runner’s Hamstring Stretch. Hold the posture for around 30 seconds whilst breathing deeply.
3. Seated Leg Lifts
Seated Leg Lifts build hamstring flexibility and strengthen the quads. To practice the posture, begin sitting with your back against a wall. Keeping one leg completely straight, bend the other knee and place your foot flat on the mat with your heel close to your bottom. Flex the foot of your straight leg so that all of your toes are facing up. Keeping your foot in flexed, raise your leg off the ground. Remember to keep your abdominals engaged and your back flat throughout. You are practising Seated Leg Lifts. Hold each lift for around 10 seconds before repeating a further 5 times on each side.
4. Parallel Squat (Static)
Parallel Squat is a great way to test out your range of motion. Before starting, you’ll need to find stability and a wide range of motion in a parallel foot position. Next, move your feet hip-distance apart with your toes facing forward. Move your hips back, bend your knees and lower your bottom towards the ground to come into Chair Pose. From here, reach your fingertips forward as you sink your bottom back and down below knee level. If you need to pause, do so. When you reach a place where it feels almost impossible to hold, that is your bottom range of motion. Depending on your flexibility, this may be Chair Pose level, or it might be with your bottom almost on the mat. You are in Parallel Squat (static). Hold the posture for around 30 seconds with your arms reached out in front of you.
5. Parallel Squat (Extension)
Once you’ve found your bottom range of motion, begin in that position and stand up straight. As you do so, keep your arms out in front of you. From a standing position, slowly lower back down to your lowest point. You are practising Parallel Squat (Extension). Repeat the process 5 times for best results. As you increase your range of motion, you will increase the strength of your Pistol Squat.
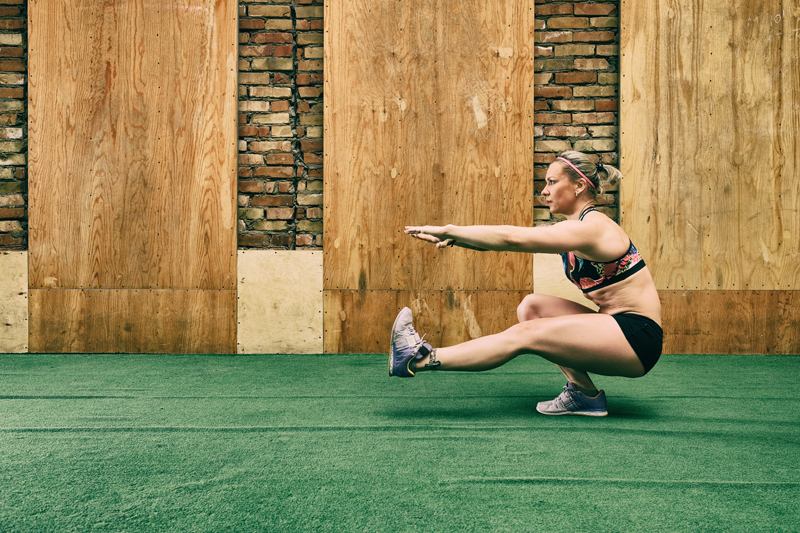
6. Pistol Squat Drill
Now you’ve built your flexibility and mobility, you can work on the strength and stability of your standing leg. You can do this through Pistol Squat Drill. To practice the drill, begin standing at the top of your mat. Bring your right one up to your chest and extend your right leg forward at hip-height. Engage your abdominals and quadriceps to keep your leg floating. After 5 seconds, take hold of your foot with both hands and hold for a further 5 seconds. Then, release your foot and move it forward until your heel touches the floor about 10 inches in front of you, similarly to how it is in Runner’s Hamstring Stretch. Touch the floor with your fingertips as you bend forward at the waist and bend your back knee. With very little weight on your front heel, see if you can float it an inch off the ground. As you move your heel forward, lower your hips until they sit just above the ground. If you cannot raise your heel off the ground, place a towel underneath it so that it can slide forward. Once your hips are close to the mat, move your feet into Parallel Squat and rise to stand. You have practised Pistol Squat Drill. At the end of the drill, repeat the process on the other side.
In Summary
So, there you have it – the Pistol Squat: how to build the strength, flexibility and mobility you need for the pose. For best results, practice wearing a flexible pair of yoga pants and a lightweight top.