
5 Amazing Ways Yoga Can Help Addiction Recovery
6th December 2019
How Gravity Affects Your Yoga Practice More Than You Realise
13th December 201910 Yoga Sequences for Strong Feet and Better Balance
Balance, coordination and strength are vital for daily living. As we age, these abilities naturally decrease. Our feet may not be as strong as they once were, and our balance and coordination also start to waver.
When we fall, whether it’s falling out of a yoga posture or in daily life, fast reaction time is the key to preventing injury. You want your body to be able to respond quickly enough to catch yourself and regain balance before hitting the ground. Thankfully, yoga can be used to keep our strength, balance and coordination up as we age. In this article, we explore 10 yoga sequences for strong feet and better balance. To get started, all you need is a mat and a comfortable yoga top.
1. Mountain Pose
The first pose in the sequence is Mountain Pose. To practice, stand tall with your feet in line with your hips. Distribute your weight evenly through each foot, ensuring you are not shifting your centre of gravity forward or back. Next, engage your thighs and draw your tailbone forward. Remember to keep your legs straight but your knees unlocked. Next, take a deep breath in and lengthen your spine as much as possible. As you exhale, draw your shoulders down and back and reach your fingertips toward the floor. On your next inhale, bring your arms up and reach your fingers toward the ceiling. Finally, bring the palms of your hands together whilst still reaching your arms upward. You are in Mountain Pose. Hold the asana for around 30 seconds whilst breathing deeply.
2. Chair Pose
Chair Pose is next. To practice this asana, stand tall with your big toes touching. Taking a deep breath in, raise your arms above your head and point your fingertips toward the ceiling. Draw both your shoulders back as you lengthen your neck. As you exhale, bend your knees and begin to lower your bottom down and back, much like you would when sitting on a chair. At this stage, it’s important to not let your knees extend past your toes. Each time you inhale, lengthen your spine a little more. With each exhale, deepen the stretch by lowering your bottom further toward the floor. You are in Chair Pose. For best results, remember to keep your abdominal muscles engaged and ensure that your thighs are touching throughout. Hold the posture for 30 seconds whilst breathing deeply.
3. Tree Pose
The next asana is Tree Pose, which strengthens the muscles and ligaments around the ankles. To practice, stand tall with your feet together. Touch your big toes together, leaving half an inch of space between your heels. Next, touch your palms together in front of your chest and engage your abdominal muscles. Slowly shift your weight onto your right foot, rooting it down by pressing firmly through the ball of your heel and big toe. Gently lift your left foot off the ground, bending the knee as you do so. When you’ve established a sense of balance, place your left foot on the inside of your right thigh. You are in Tree Pose. Hold the posture for 30 seconds before switching sides.
4. Crescent Lunge
Next is Crescent Lunge. To practice the posture, begin by standing tall. Hinge at the waist and lower your torso towards the mat until your hands make contact. Next, move your left foot forward and place it in-between your hands. Find your balance and stretch your back leg out to balance on the ball of your foot. Your front leg should be bent with your knee perpendicular to your heel. Lift your hips and reach your hands up as you lengthen your spine and stretch your shoulders. Notice your core strength and ensure that your front left knee stays at a 90-degree angle. You are in Crescent Lunge. Stay in the pose for 5-10 breaths before coming out of the pose by moving your hands down and placing them on either side of your left foot.
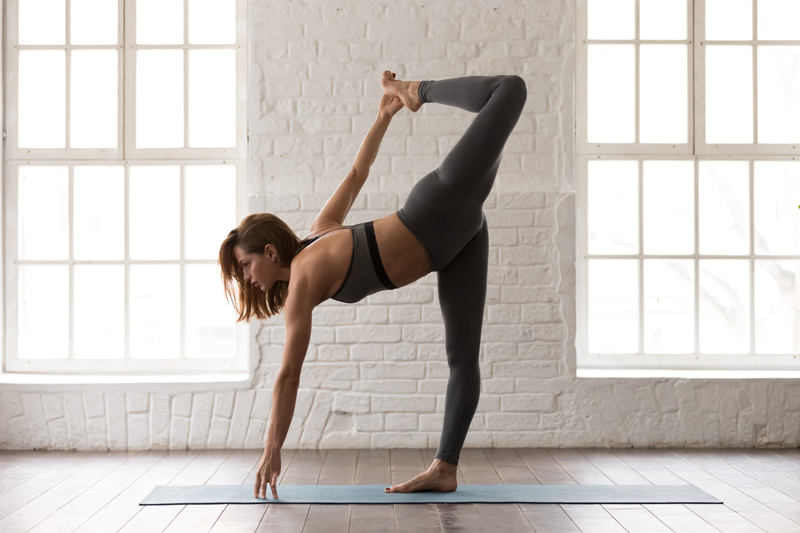
5. Half Moon Pose
Half Moon is the next asana in the sequence. To practice this pose, start by standing tall. Next, move your feet wide apart and turn your right foot 90 degrees clockwise. Bending at the waist, gently bring your hands to the ground and rest them in-line with your feet. Next, lift your left leg off the ground and extend it into the air. Finally, lift your left hand and stretch it into the air. You are in Half Moon Pose. Hold the position for around 30 seconds before lowering your arm and leg back down to the ground.
6. Downward Dog
Downward Dog is ideal or improving strength and balance. To practice the posture, stand tall on your mat with your feet shoulder-width apart. Next, hinge at the waist and lower your upper body toward the ground until your hands are securely on the mat. Your body should now form a triangle. Tight hamstrings may prevent beginners from touching the ground; to make the pose a little easier, try bending your knees slightly throughout the asana. Next, move your head between your upper arms and spread your fingers for additional balance. You are in Downward Dog. For best results, breathe deeply whilst practising the pose and hang your head gently between your shoulders.
7. Low Lunge
Next is Low Lunge. To practice the pose, start by standing tall on your mat. Step your right leg forward and lift your hips up and back until they are aligned directly over your left knee. Next, raise both arms up and press your hips down until you feel the muscles engage. You should feel a stretch in your outer hip of your left leg. You are in Low Lunge. Hold the asana for 30 seconds before repeating on the other side.
8. Warrior I
The Warrior postures are ideal for strong feet and better balance. To practice the Warrior One, begin standing tall on your mat. Keeping your left leg in place, take a big step forward with your right leg. Next, bend your right leg and stretch your left leg out behind you. Finally, roll your shoulders back and lift your arms above your head. You are in Warrior One. Hold the asana for around 30 seconds before switching sides.
9. Warrior II
To practice Warrior II, stand tall on your mat with your arms by your sides. As you exhale, move your feet wide apart. Next, turn your left foot slightly to the left and your right foot out 90 degrees. Raise your arms out to the sides until they are in line with your shoulders. Your palms should remain facing down. On your next exhale, bend your right knee until it is directly above your right ankle. Lower your hips until your right thigh is as parallel to the floor. If you can’t get your thigh parallel to the floor, just move it as far as you can whilst keeping the bend at 90 degrees. You are in Warrior II. Hold the asana for around 1 minute before switching sides.
10. Warrior III
To practice Warrior III, stand tall with your hands on your hips. Straighten your left leg and stretch it back behind you. Next, square your hips to the mat, bringing your torso and lifted leg parallel to the floor. Depending on your preference, keep your hands on your hips or choose another variation. You are in Warrior III. Hold the asana for around 30 seconds before switching sides.
In Summary
So, there you have it – 10 yoga sequences for strong feet and better balance. If you’re hoping to improve your strength, balance and coordination, put on your yoga pants and practice the sequence above.